You can visualize and explore the segmentation and image data using the web based visualization tool Neuroglancer developed with the Connectomics at Google team by Jeremy Maitin-Shepard and extended by members of our collaboration with some additional features. This page will give you a basic introduction to using Neuroglancer. For advanced uses, reference see the MICrONS Tutorials.
Note: Neuroglancer works best in Chrome and Firefox, and may not work as intended in Safari.

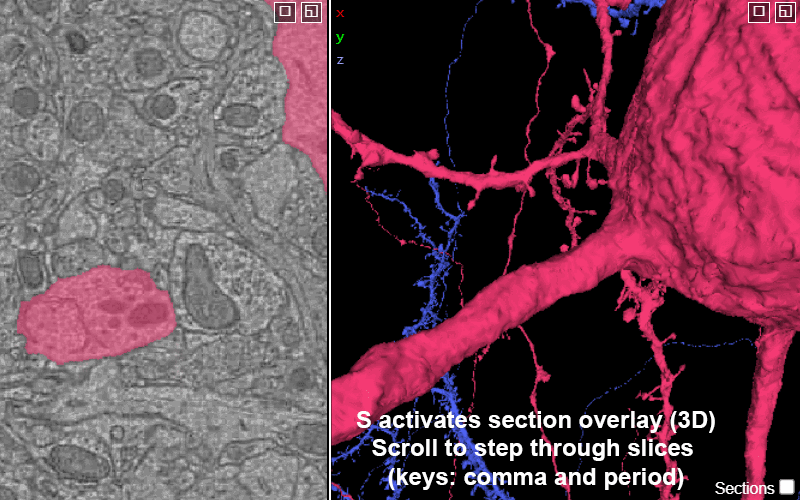
Explore the volume with Neuroglancer: a browser-based visualization tool that overlays imagery volumes, segmentation, 3D reconstruction, and annotations.
Basic Navigation
3D Navigation (right panel by default)

Rotate 3D view: left ciick & drag (rotates around the point you’re centered at)

Center something in every panel: right click on it.
(On a Mac trackpad, two-finger click.)
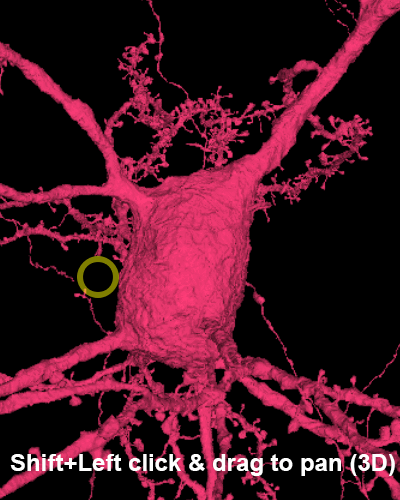
Pan in 3D panel: shift + left click & drag
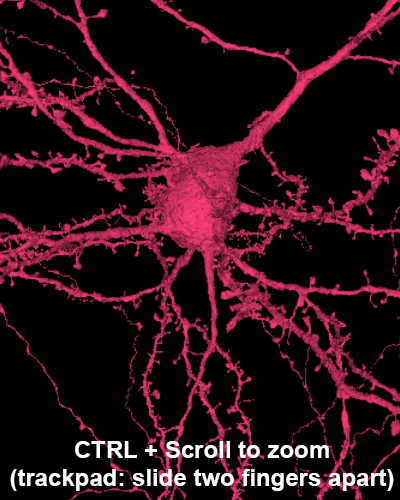
Zoom: hover over 3D panel and ctrl + mouse wheel (on trackpads, slide two fingers apart.)
2D Navigation (left panel by default)

Select a cell: double click that cell in the 2D view
Deselect a cell: double click that cell in any view

Center something in every panel: right click on it.
(On a Mac trackpad, two-finger click.)
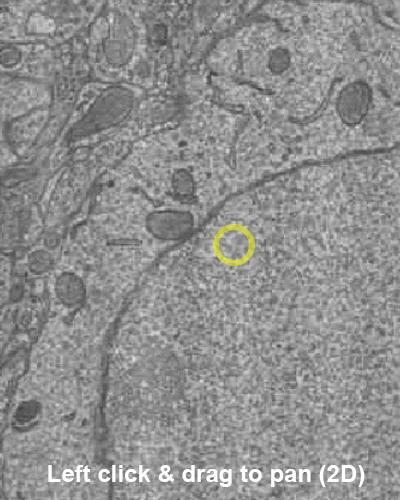
Pan in EM image (2D) panel: click + drag
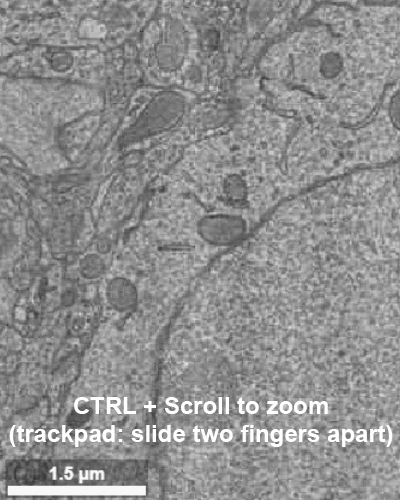
Zoom: hover over image panel and ctrl + mouse wheel (on trackpads, slide two fingers apart.)
Viewer Controls and Hotkeys
Change between panel layouts with the space key or by selecting the box-in-box in the upper corner of any panel.
You have the option of 1 panel, 2 panel, or 4 panel views. The 2 panel views can be: xy-3d, xz-3d, and yz-3D.
xy is in the plane of imaging and offers the highest resolution. The default view is xy-3d

Move between slices: hover over EM image panel and use mouse wheel (or comma and period keys)
Activating the slice overlay in 3D (toggled on/off with key s), can help orient in space
Additional hotkeys:
A: show/hide colored axes lines
S: show/hide the 2D slice in 3D
L: global recolor segments
O: switch between 3D orthographic and projection view
Z: snap to nearest axes NOTE: this is also useful if you have ‘sheared’ the 2D view with shift+left click & drag and want to return to original orientation
Introductory video
For more tutorials, videos, and advanced use cases, check out the Neuroglancer tutorial pages.